Managing Customer Contacts
Last update:
Managing Customer Contacts: Import & Export
You can add customers one at a time, or import them in bulk using an Excel file. Once imported, customers can be tagged with labels, making it easy to filter specific customer groups when sending broadcast messages later.
Auto-Profiling & Social CRM
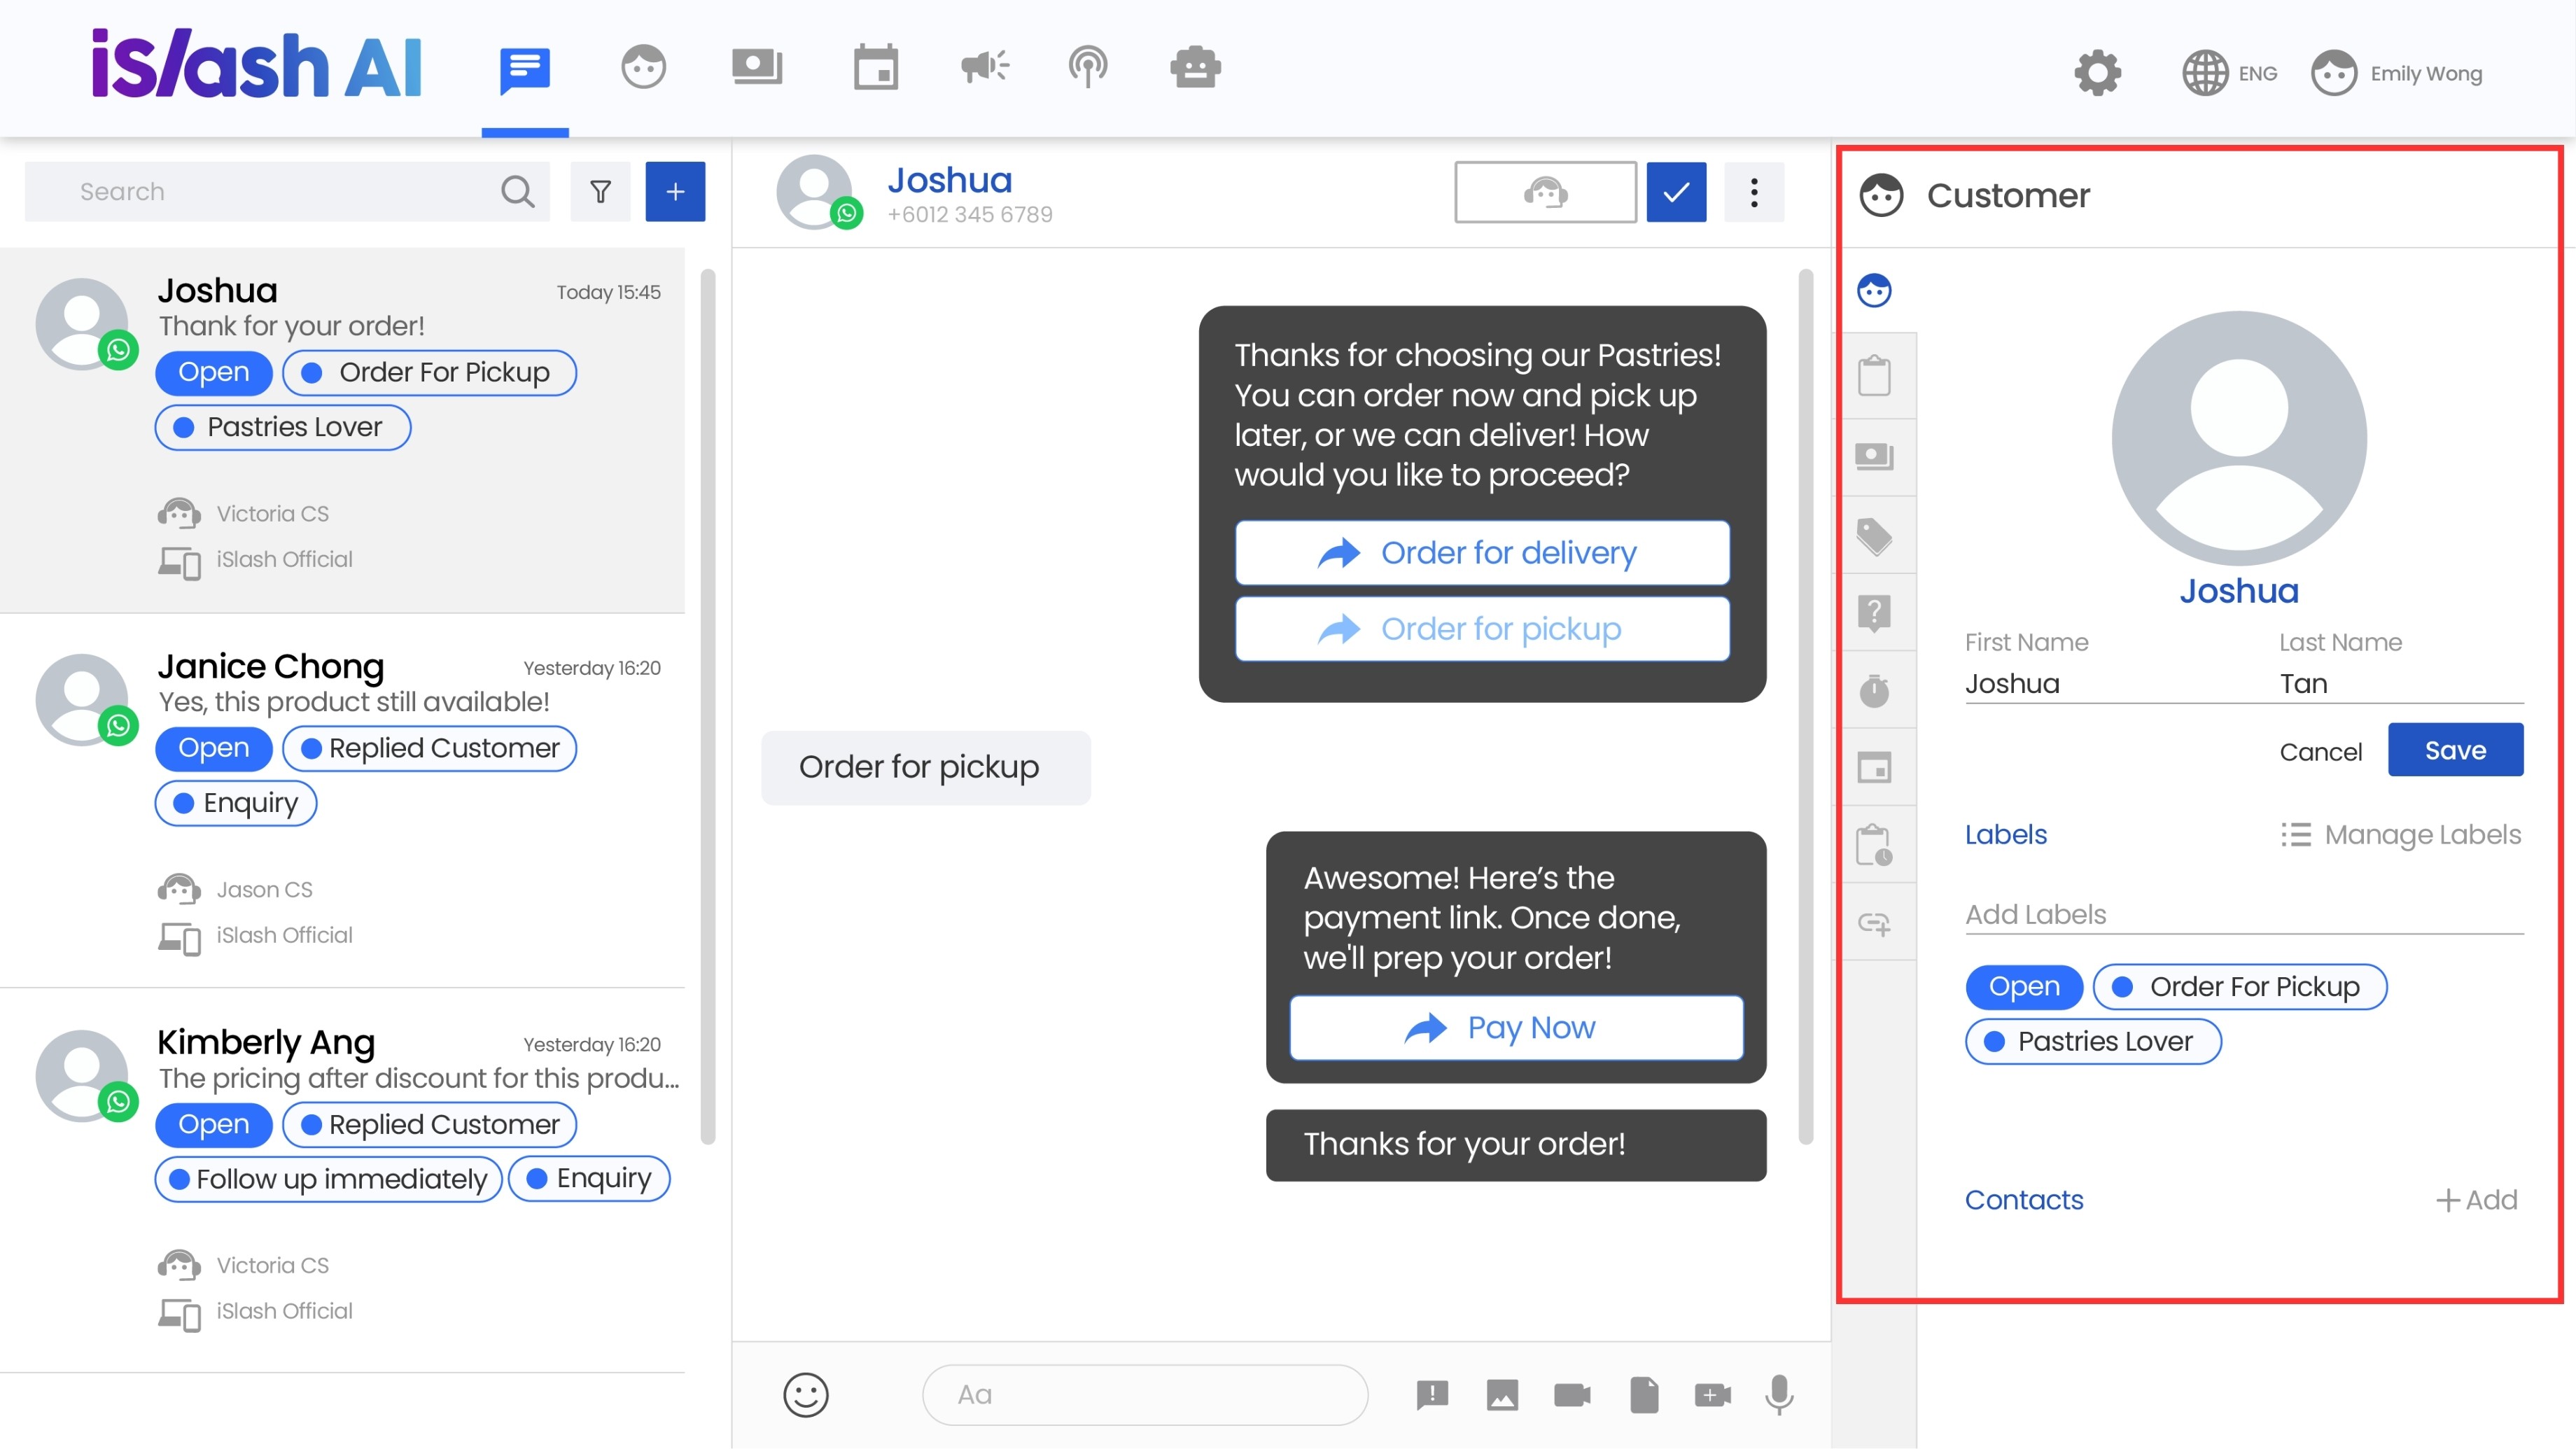
The iSlash AI platform automatically builds detailed customer profiles by collecting data from multiple channels. This gives businesses a clear view of customer preferences, making it easier to personalize every interaction.
Setup Requirements
An active iSlash AI account
Before doing a bulk import, prepare your customer contact data
Add Customer Contacts
There are two ways to add customers: adding them one at a time or bulk import.
When adding a customer one at a time, you can also choose whether to create a chat at the same time. There are two methods:
Method 1: Add via "Chats"
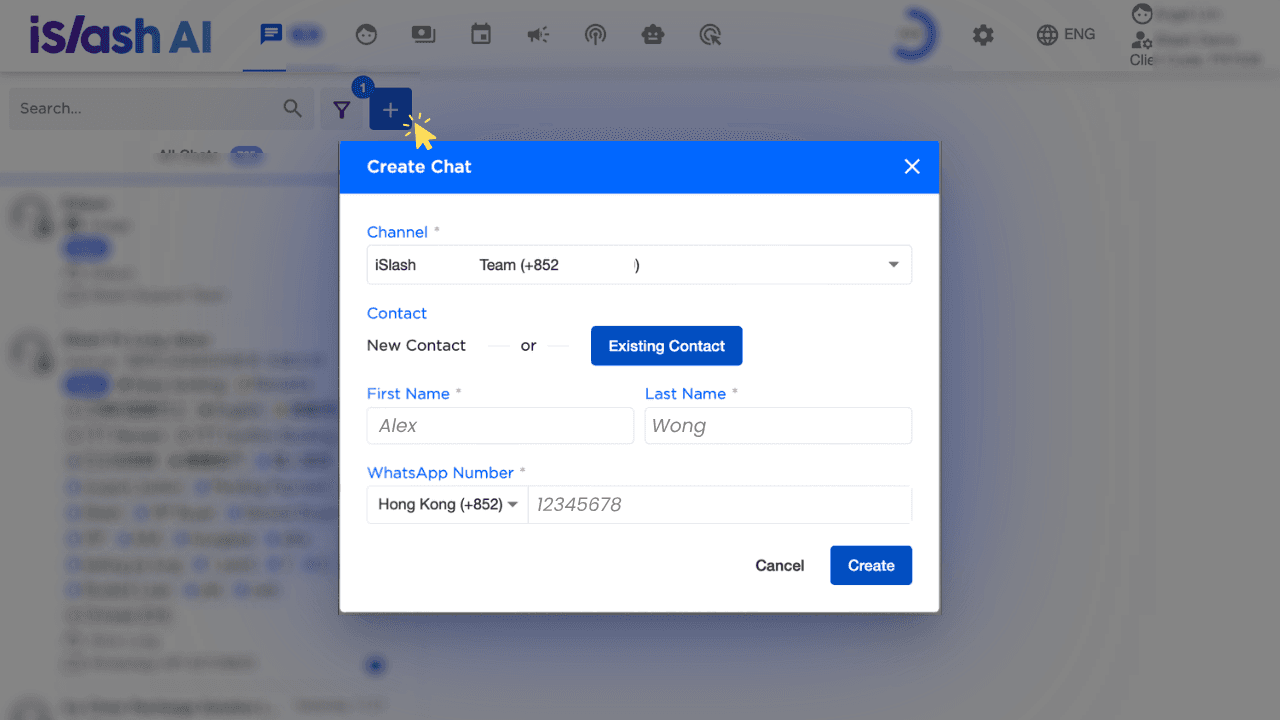
Go to Chats, click ➕ to start a new chat
Select the Channel to add the customer to
Select Individual Chat
Under Contact, choose:
New Contact
Enter the first name, last name, and WhatsApp number (select the country code first)
Existing Contact
Select an existing customer from your customer list to create a new chat for them on another channel
Click Create. This creates the customer and automatically opens a chat, so you can start messaging right away.
Method 2: Add via "Customers"
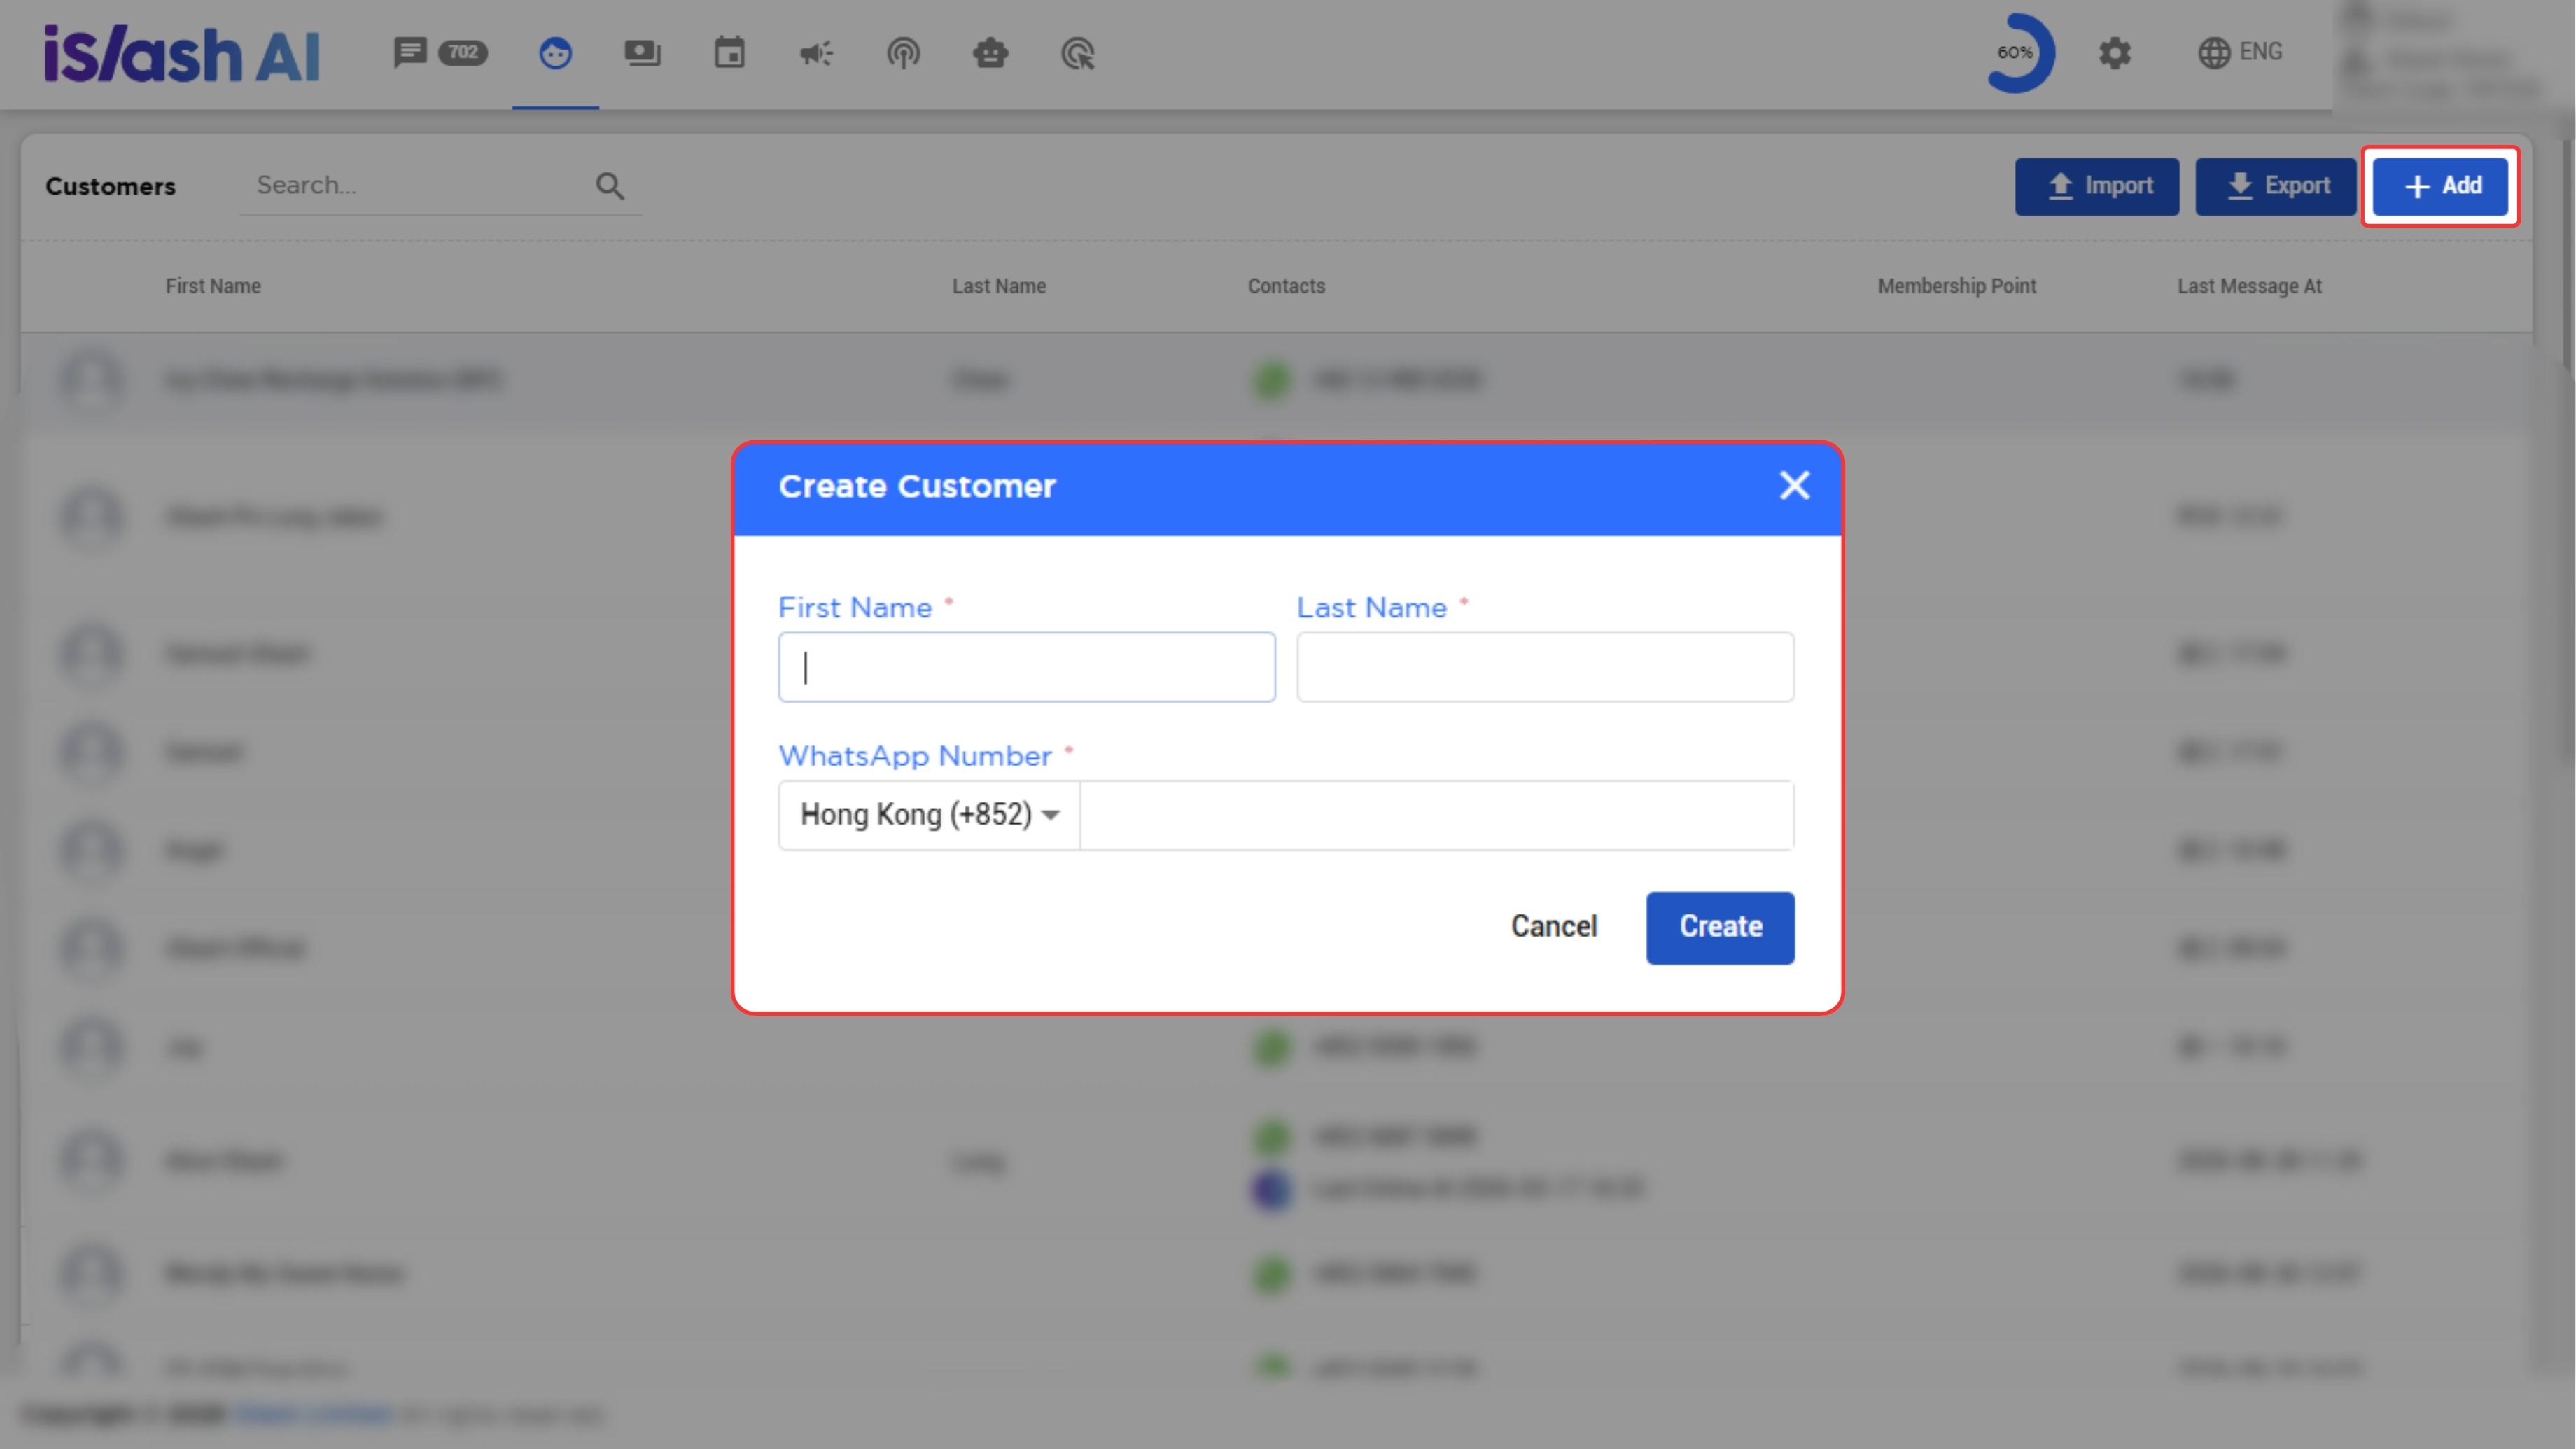
Go to Customers, click ➕ Add in the top right
In the pop-up, enter:
First name
Last name
WhatsApp number
Click Create. The new customer appears immediately in your customer list
This method only adds the customer; it does not create a chat. If you want to message the customer, you'll need to use Broadcast.
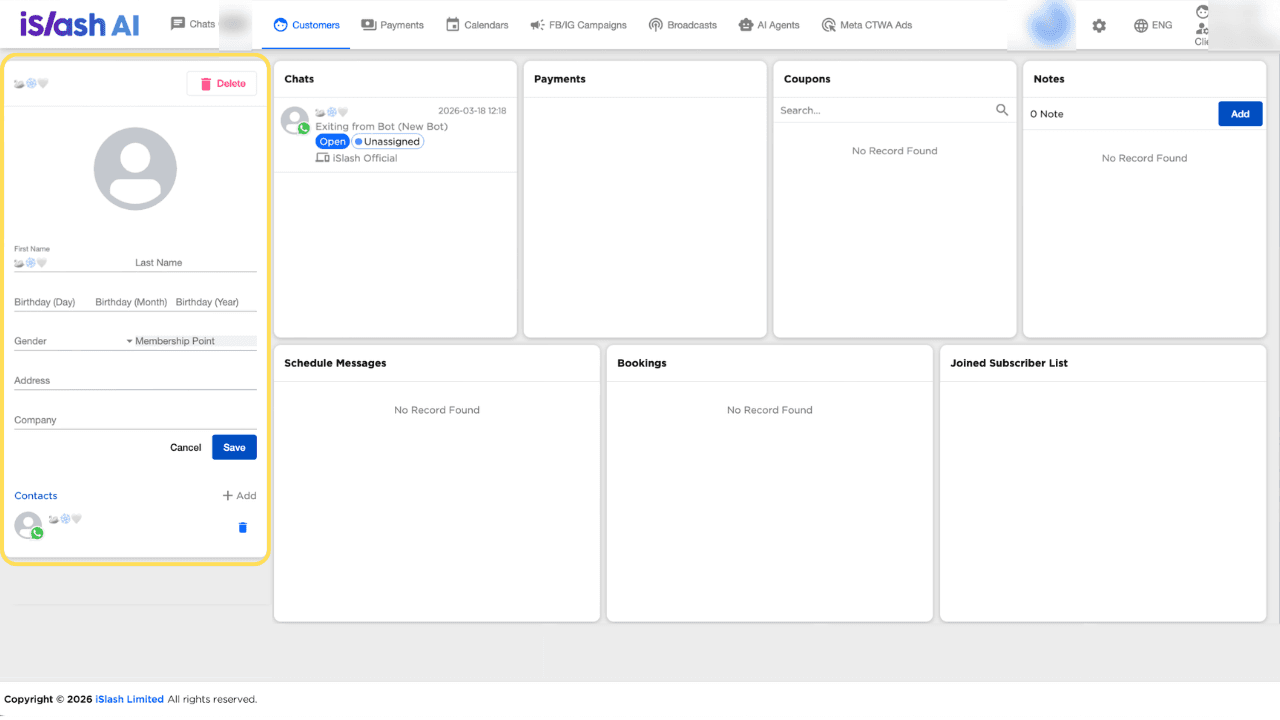
Note: After a customer is added, the default fields include first name, last name, birthday, gender, membership points, address, and company.
Besides the default fields, you can also add custom fields via Settings → Customer Custom Fields.
Bulk Import Customer Contacts
Always export the latest Excel template from your account before editing it — don't use an old file or a self-made format, to make sure your data imports correctly.
Step 1: Download the import template
Go to Customers, click Export in the top right
If you don't see the Export button, this may be related to your account permissions. Please check Additional Control Options.
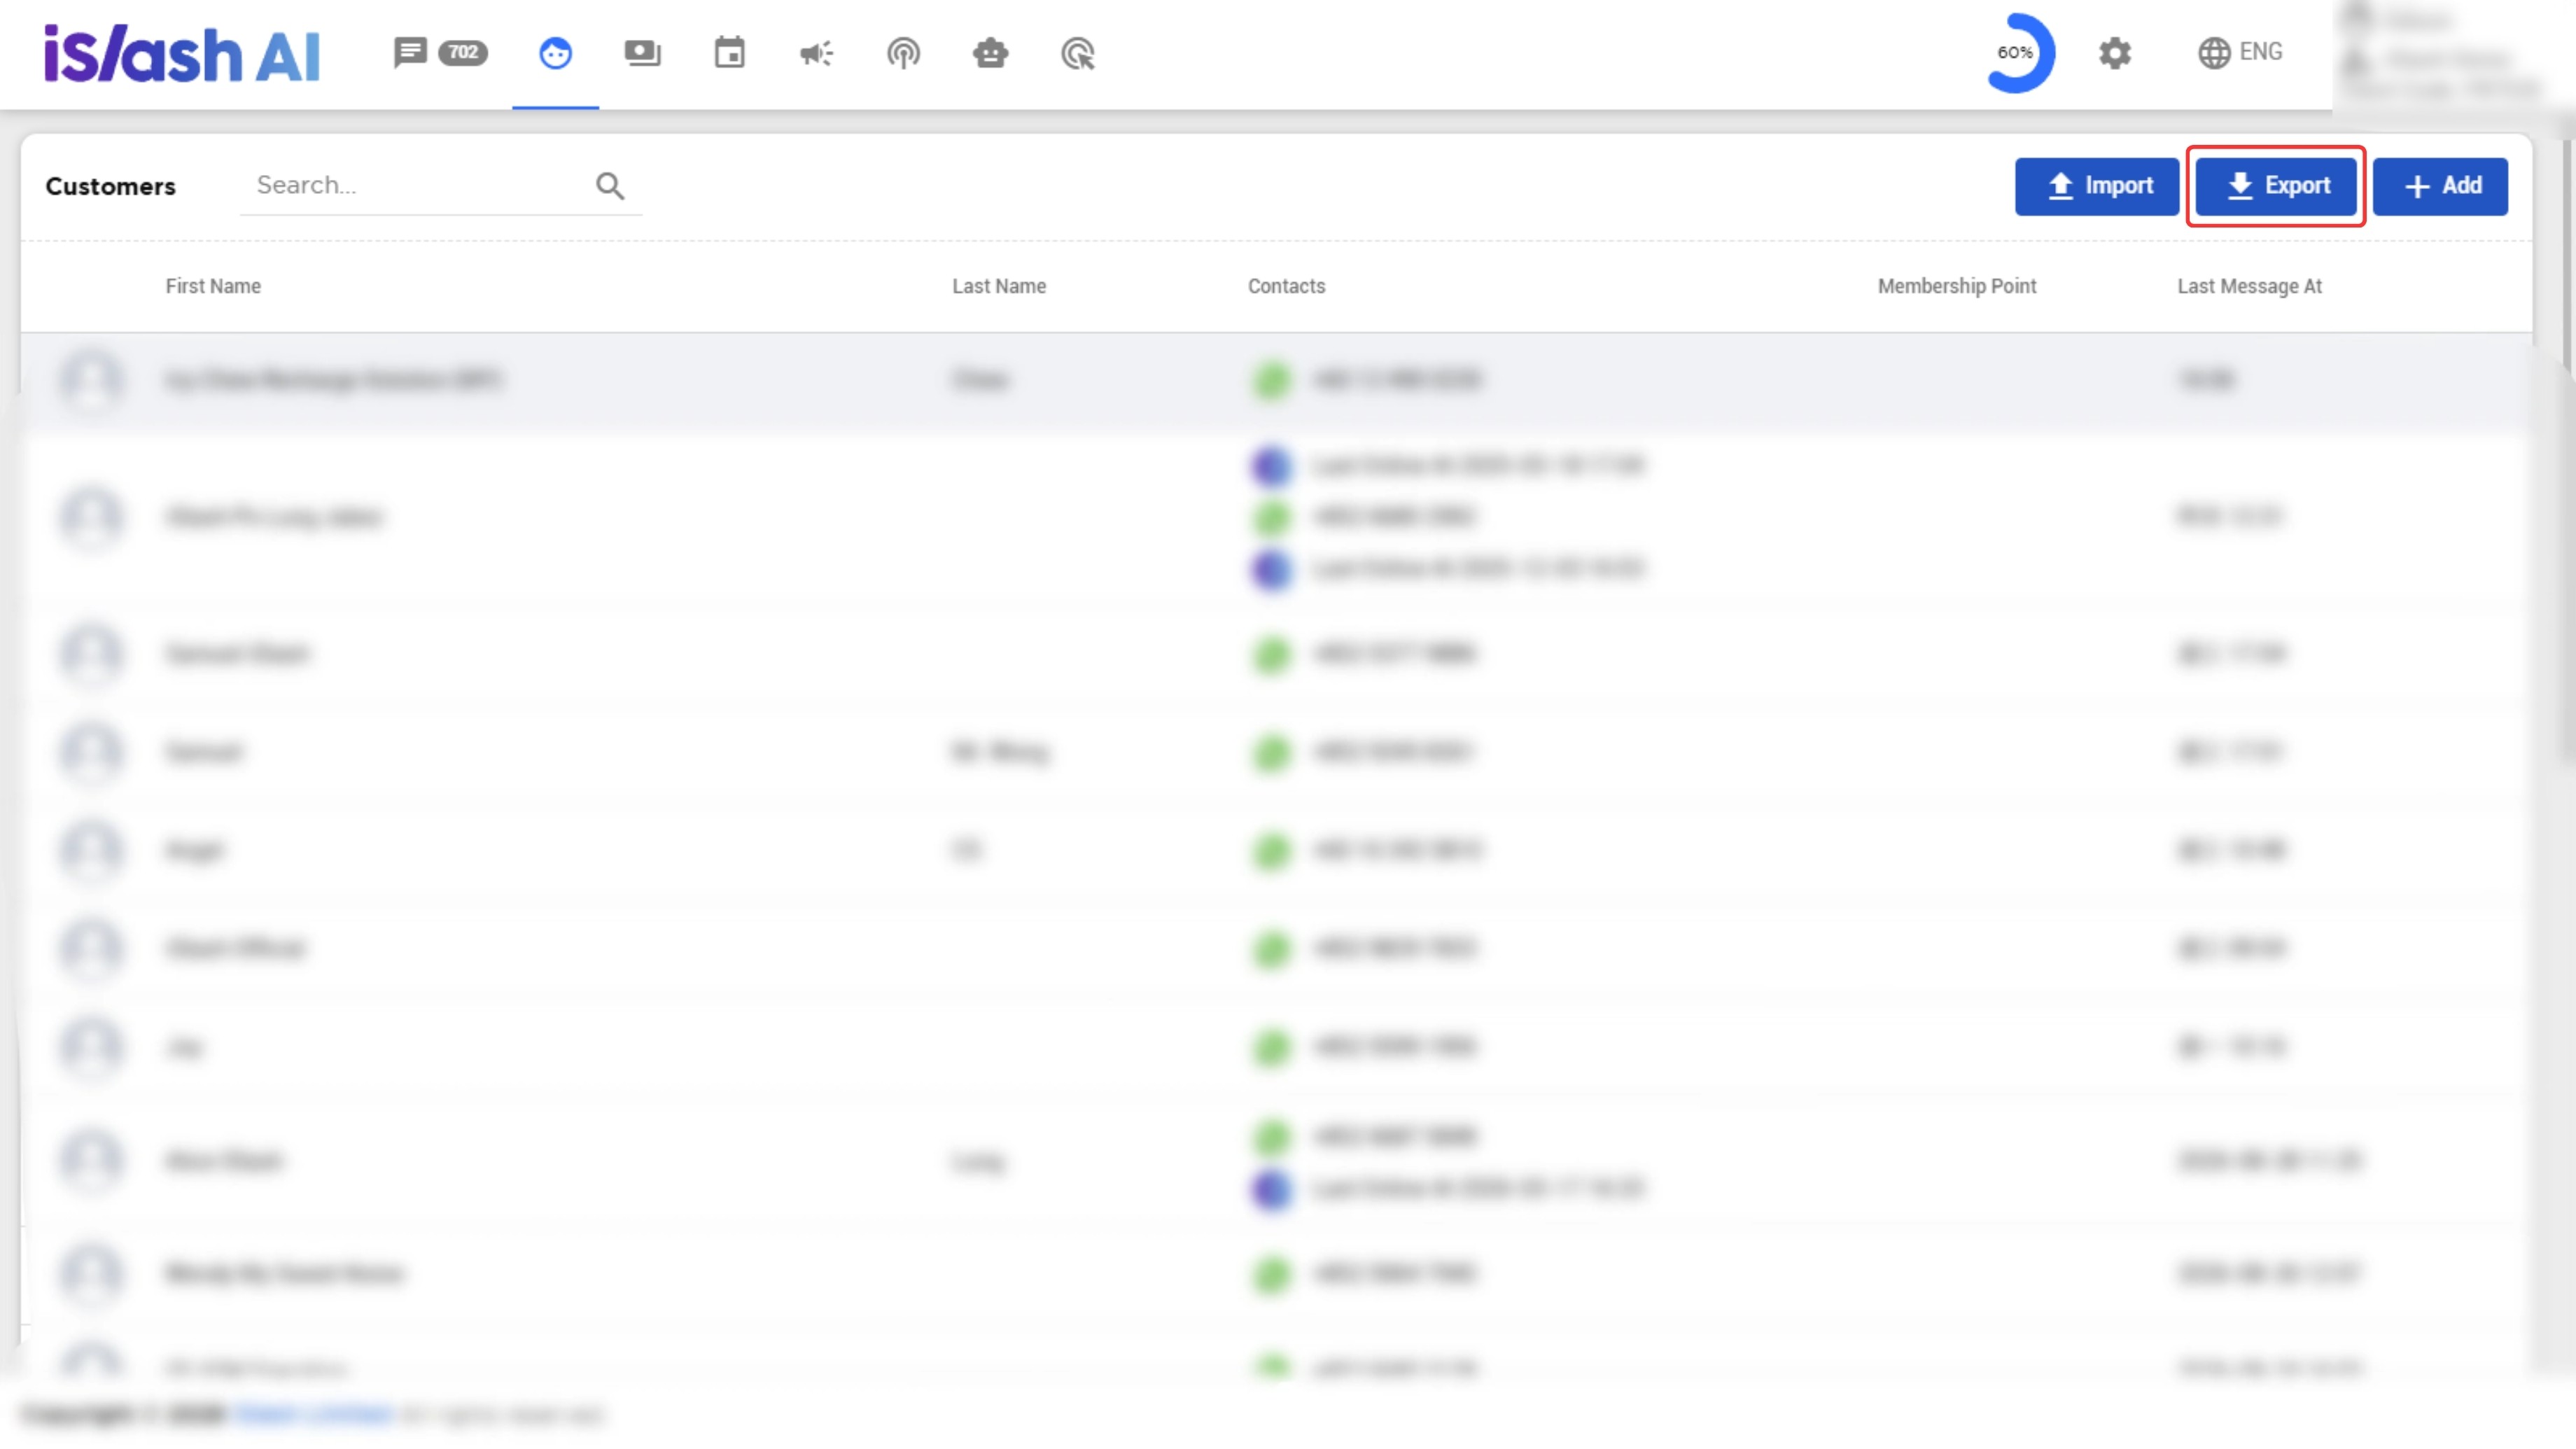
From the dropdown, select the template you need
Template
Purpose
Customer Info
Creates customer contacts only
Customer Label
Creates customer contacts, chats, and labels at the same time, and can also assign the responsible agent.
The Channel, Type, and Contact (with country code) columns in the template cannot be left blankFor the full details on managing customer labels (creating, editing, segmenting, etc.), see Customer Label Management & Segmentation.
Wait for the file to generate, then click Download.
Step 2: Fill in the Excel template
Rules:
Don't edit the header Row (Row 1)
If this is your first import (no existing customers yet), start entering data from Row 2
If your account already has existing customers, the exported template will include their data — don't delete these existing rows; just add new customers below them
Don't change the original column order or formatting
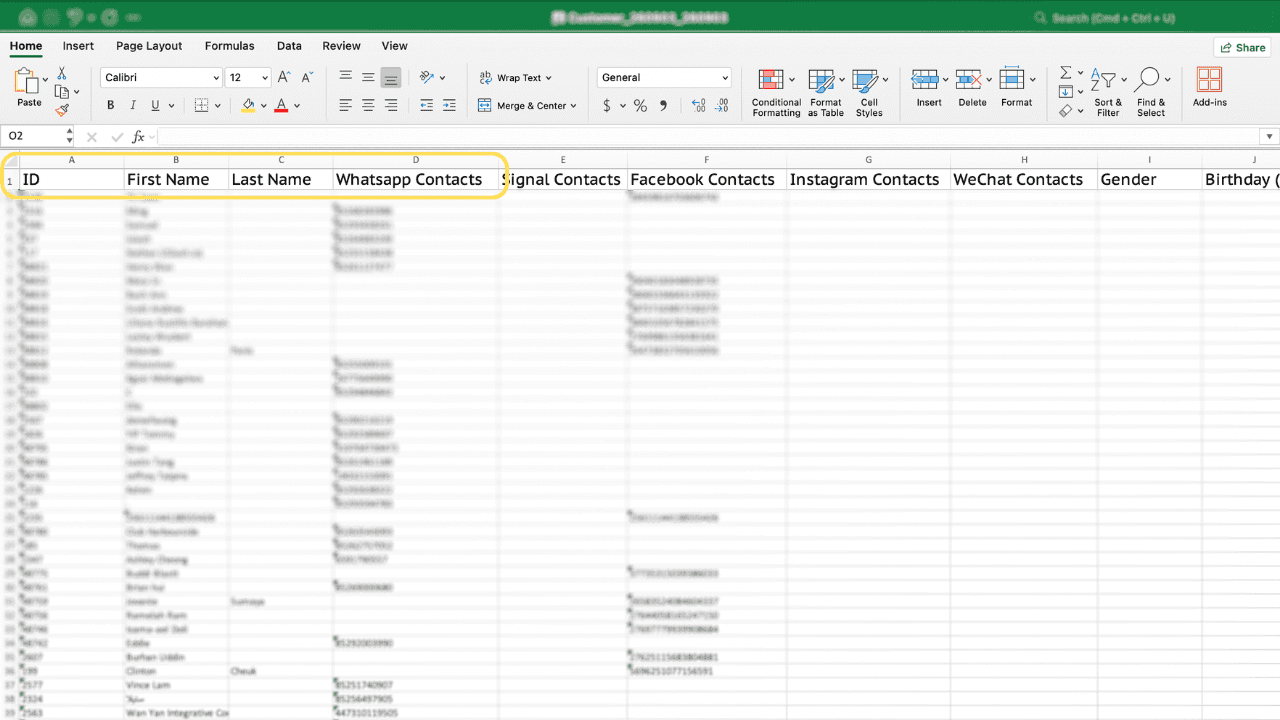
Column
Description
ID
Corresponds to the iSlash customer ID.
Leave blank for new contacts; keep the existing ID when updating an existing customerFirst Name
Customer's first name
Last Name
Customer's last name
WhatsApp Contacts
Country code plus phone number, with no spaces or special characters.
Example: 85298765432 (852 is Hong Kong's country code, 98765432 is the phone number).
Make sure there are no duplicate phone numbers in the file.
Note: If a WhatsApp number matches an existing customer but the ID field is left blank, the existing customer record will be marked "Out of Service", and a new customer record will be created.
Step 3: Upload and Import
Go to Import, click Customer Info/Excel
Select the option that matches your Excel file type — if you exported Customer Info, select Customer Info when importing;
if you exported Customer Label, select Customer Label when importing
In the Import Customer Info pop-up, click Choose file and select your completed Excel file
Click Import

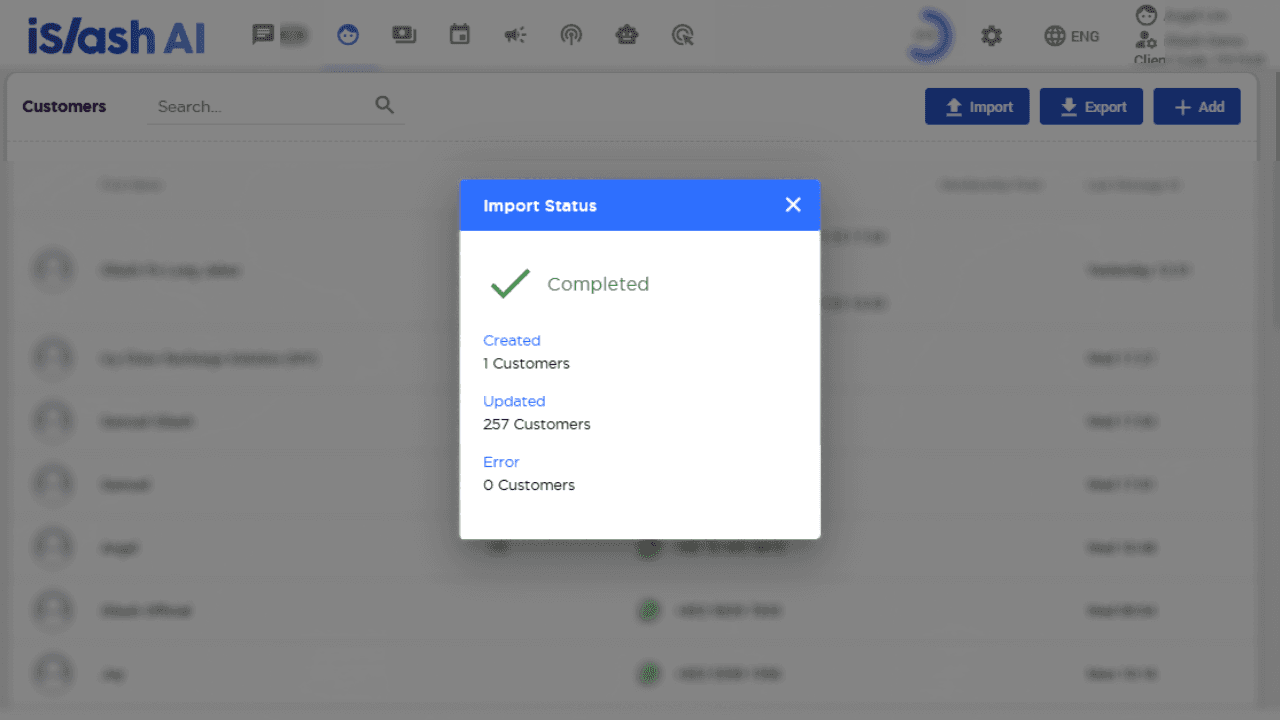
Once processing is complete, an Import Status window will pop up showing Completed, along with three numbers:
Created: number of new customers
Updated: number of updated customers
Error: number of errors. If there are errors, the reason will be shown below
Insights


How can I confirm my customer data was imported successfully?
Once the import finishes, an Import Status window pops up showing the Created, Updated, and Error counts
You can also go to Customers and search by name or number to confirm the data
Can I delete multiple customer contacts at once?
The system doesn't currently support bulk deletion. If you need to delete multiple contacts, please contact customer support for assistance; you can also delete customer contacts one at a time.
What happens if I import a duplicate phone number with a different name?
If the phone number already exists but the name is different, the system will mark the existing contact as "Out of Service" and create a new customer record with the new name.
Can I import Facebook and/or Instagram Customer Listing?
The ID shown in iSlash AI Platform is a special ID specifically used between Facebook users / IG users and iSlash.Facebook uses this approach to a certain extent to protect user privacy.While there are unofficial methods in the market to bypass this, but iSlash AI follows the official approach provided by Meta.
This is part of Facebook’s privacy protection mechanism. Without it, everyone’s Facebook would be receiving even more spam messages than it already does.
The unofficial methods out there could potentially cause customer data to leak or lead to other issues.