Setting Up Web Plugin Chat
Last update:
Your website is often the first point of contact for customers. By integrating your website with iSlash AI Web Plugin Chat, you can provide real-time support, collect leads, and automate interactions through chat widgets.
Follow these steps to connect your website to iSlash AI and enhance your customer experience.
Setup Requirements
An active iSlash AI account, register a free account here.
Access to your website builder.
Video Tutorial
Step-by-Step Guide
I) Creating Web Plugin Channel
Logon to iSlash AI Platform at https://app.islash.io/
Go to Settings:
Go to Channels and Click on "+" to create a new channel.
Rename to "Web", then under the Platform section, select "Web" :

Click "Save" and the Web Plugin Chat channel is created.
II) Customizing Web Plugin Messenger Appearance
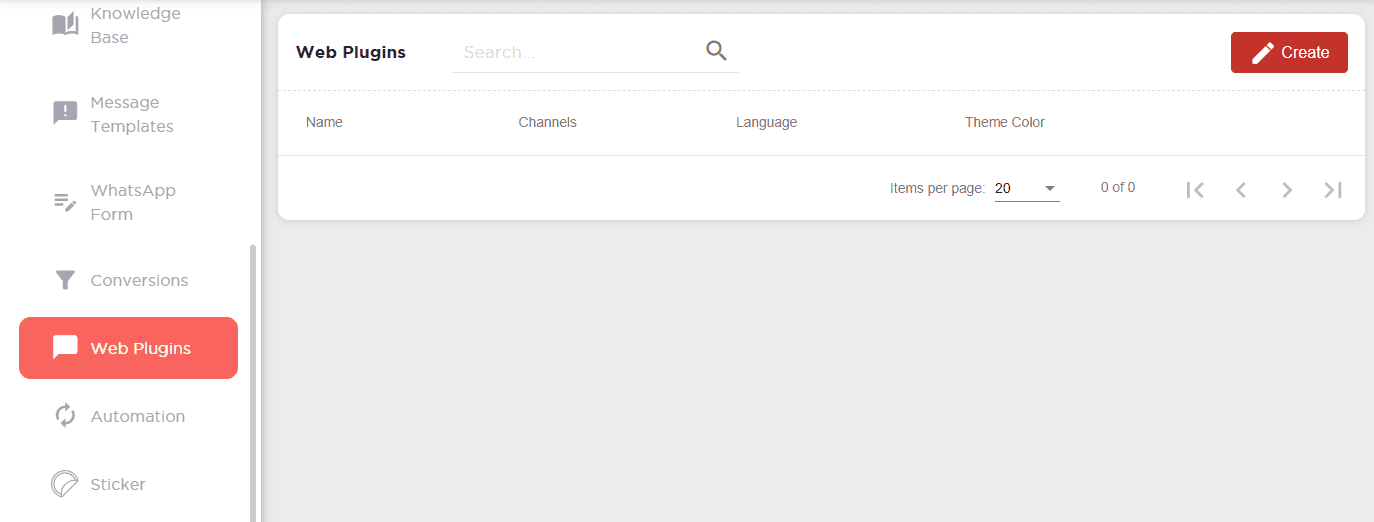
Next, navigate to left panels and click on "Web Plugins":
Click "Create" to start customizing your web plugin chat:
Start customizing the Appearance of the Web Plugin Messenger:

Name: Enter a unique name for your web plugin, such as your website’s name.
Popup Title: This is the header text that appears when users click the chat icon.
Example: "Chat with Us!"
Popup Body: Write a brief introductory message for the chat.
Example: "How can we assist you today?"
Welcome Message (Optional): A message displayed above the chat icon to encourage users to click and chat.
Example: "Need help? Click to chat!"
Position: Choose the position for the chat icon on your website - Right or Left.
Theme Color: Select your preferred theme color using a HEX color code.
Margins: Set Margin Right and Margin Bottom values to "20" (in pixels) for standard placement.
Language: Select the language for your web plugin from the following options:
English (ENG), Chinese Traditional (繁體), Chinese Simplified (简体).
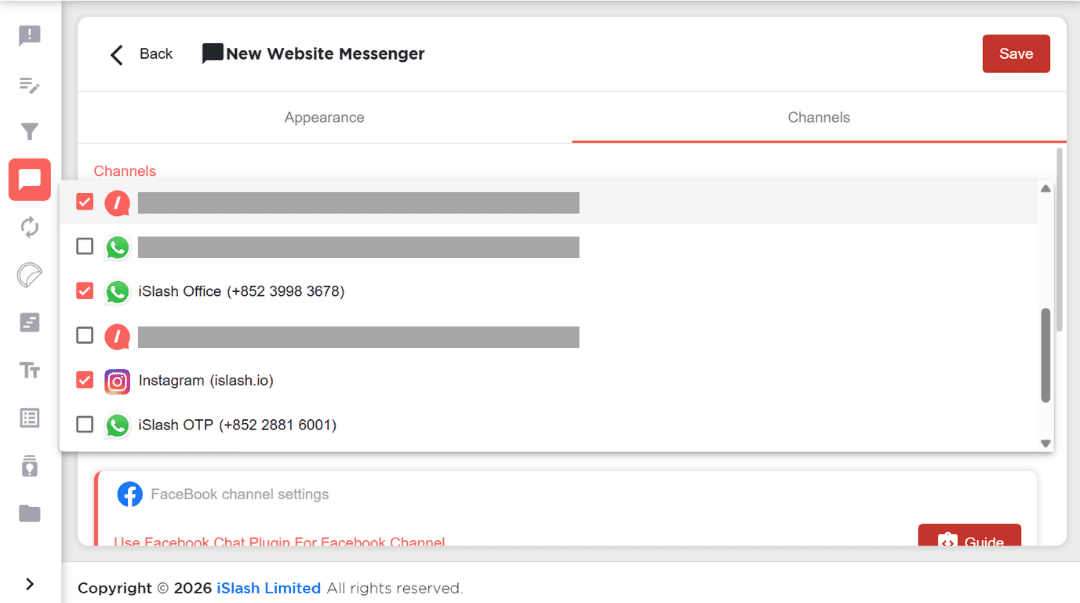
III) Customizing Web Plugin Messenger Channels
Go to the next tab do customize the Channels Settings:
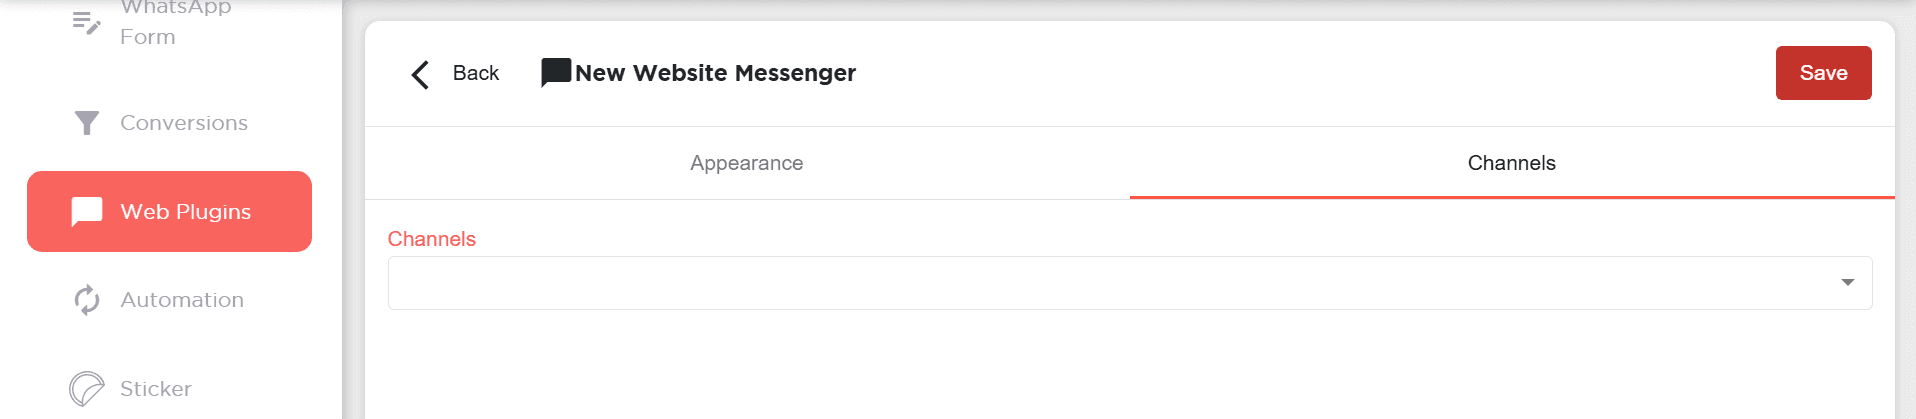
In the list, select any existing messaging channels to be included in this web plugin chat.
If you have selected a Web Channel, you will be presented with Web Channel Settings:
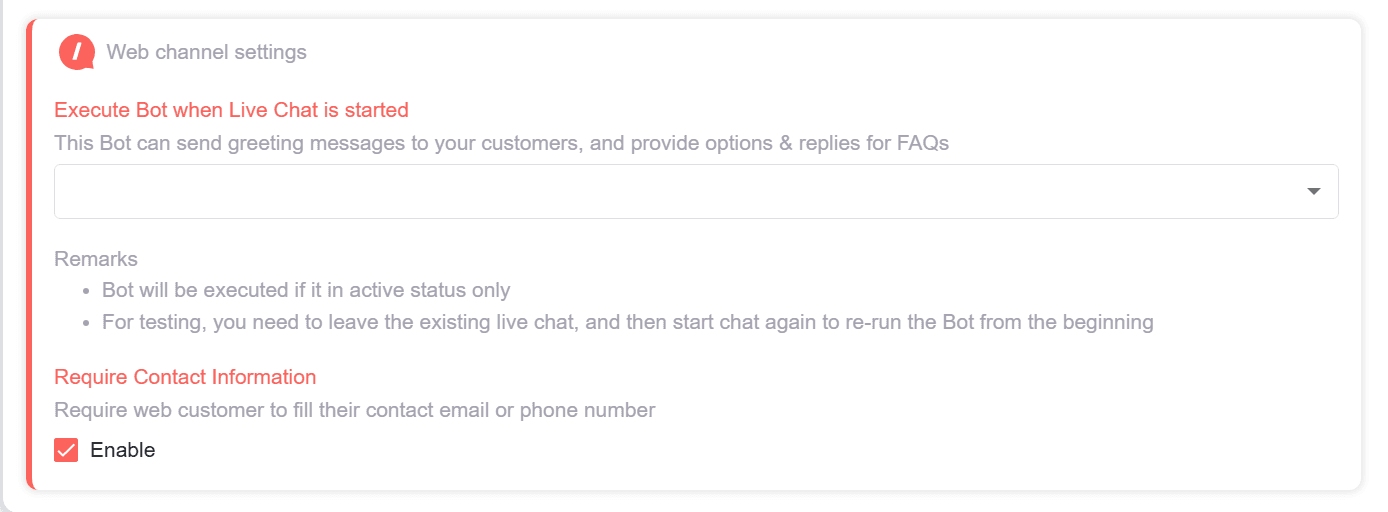
Execute Bot when Live Chat is started : Assign an AI Agent (Bot) to handle live chat interactions automatically.
This allows your website live chat and chatbot to provide automated responses and gather customer information efficiently.
Require Contact Information : Enable/Disable
This will prompt customers to provide their email or phone number before starting the chat, making it easier for follow-ups.
If you have selected a WhatsApp channel, you will be presented with WhatsApp channel settings:
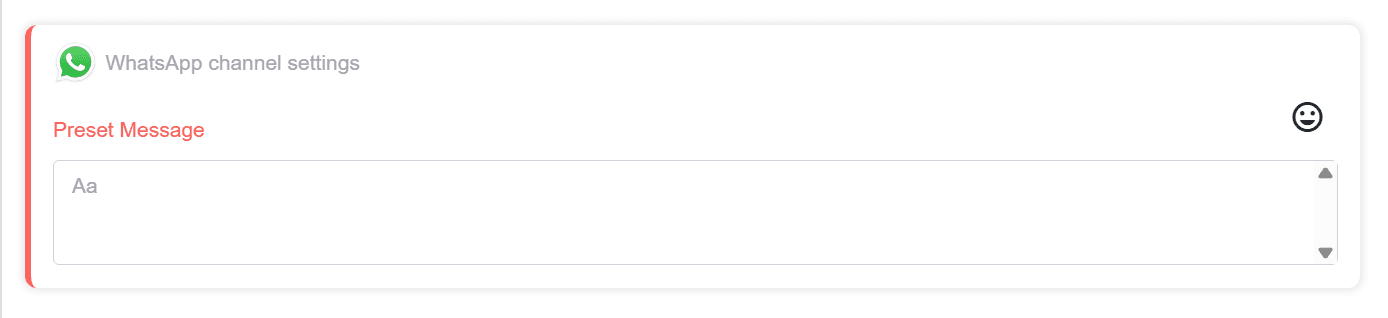
Preset Message: Add a preset message,
ideally a short phrase that has been set as the Start Condition Keywords to an AI Agent.
When a customer clicks the WhatsApp icon, a WhatsApp chat with your business will open, and this preset message will be automatically filled in for them.
If you have selected a Facebook Messenger channel, you will be presented with Facebook channel settings:

Enable/Disable.
Tick the Enable box and follow the Guide to complete Facebook Messenger Chat Plugin setup.
Once completed, click "Save".
IV) Injecting Web Plugin Chat to Your Website
The Web Plugin Chat preview is created:
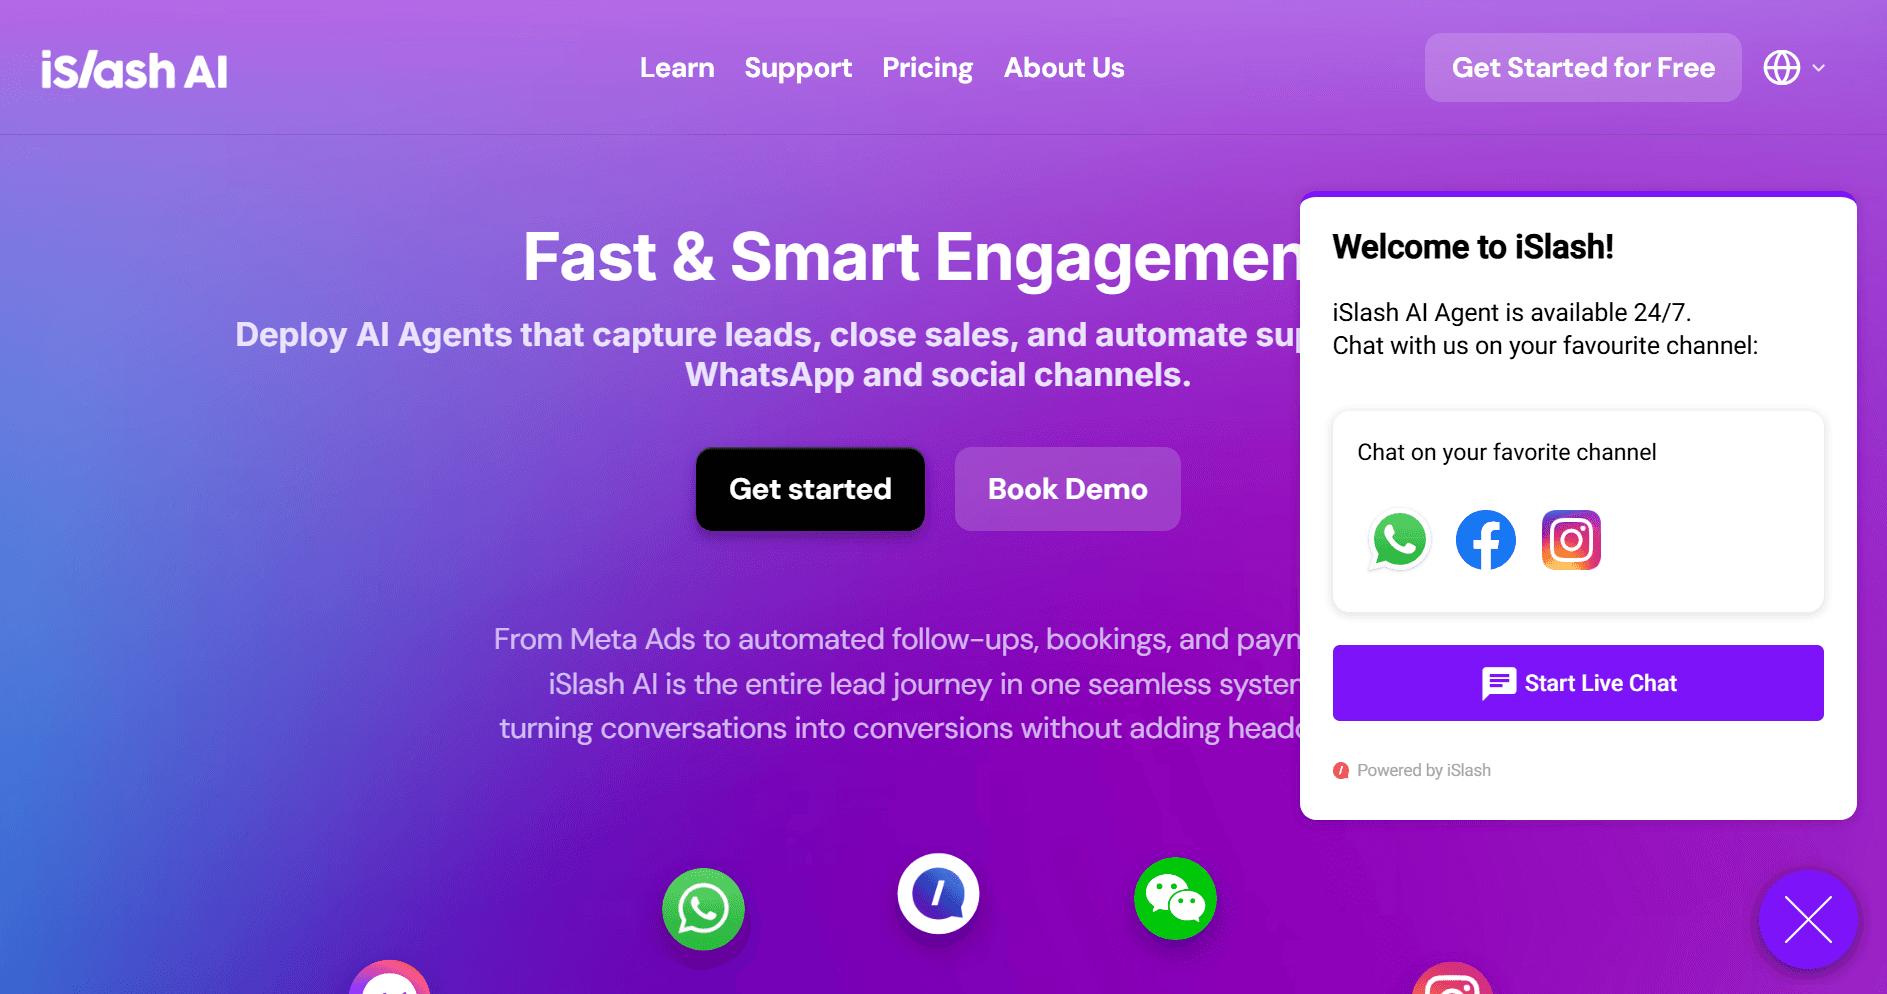
The preview shows how the plugin will look to your customers, including the welcome message, popup title, and popup body. If needed, make adjustments to your settings and click Save again.
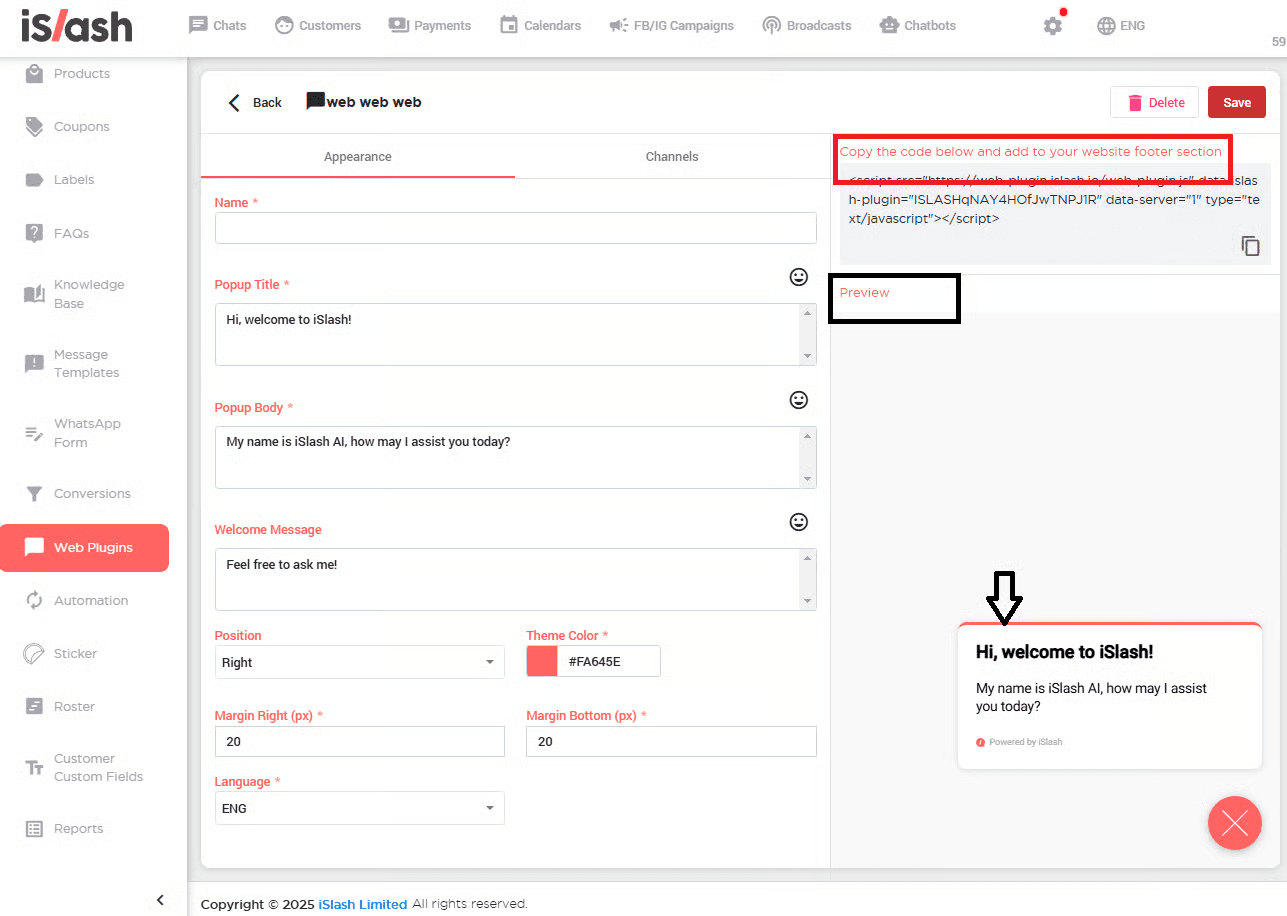
Find JavaScript code on the right column:
Copy the JavaScript code provided
Add the JavaScript code to the footer section of your website.
Your website is now equipped with web plugin chat, which can direct website visitors into your private traffic in iSlash AI Platform.
Insights


Can I direct my website visitor to WhatsApp API channel?
Yes, you can. You will first need to integrate WhatsApp Business API to your iSlash AI account. Then go to Settings > Web Plugins > Channels Settings: at the drop down list, tick to enable WhatsApp.