iSlash AI now supports Shift Management, allowing businesses to assign customer chats to agents based on their working hours. With shifts, you can ensure fair workload distribution, 24/7 coverage, and a smoother customer experience.
This guide will walk you through the steps to set up shifts, assign agents, and manage incoming chats according to your team’s schedule.
Before you begin, make sure you have:
An Admin or Manager account in iSlash AI.
Team members already added to iSlash AI.
A clear understanding of your team’s working hours.
Step-by-step Guide
Logon to iSlash AI Platform at https://app.islash.io/
Go to Settings:

At the left panel menu, select "Roster", then go to 2nd tab under Roster.
Click "+" to create Roster Group: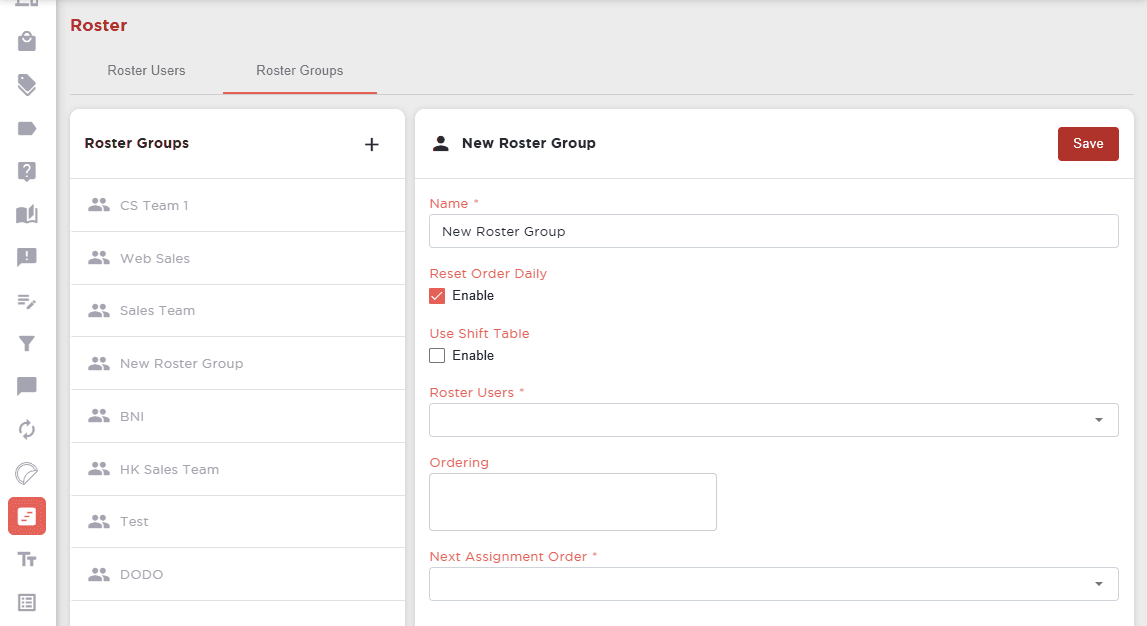
Update the following details and click Save:
Name- Roster Group Name
Reset Order Daily- Enable/ Disable
User Shift Table- Enable for Shift Management
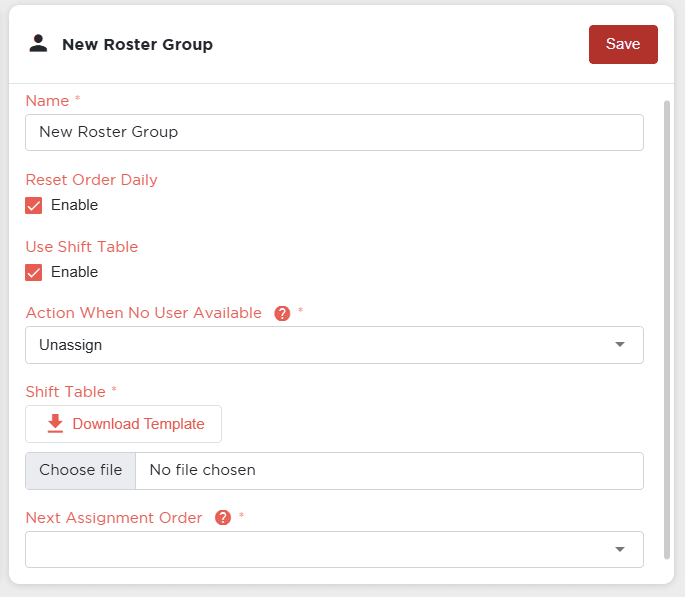
Action When No User Available- Unassign/ Assign Default User
How to handle if no user is available in the shift table. Unassign: keep the current chat unassigned; Assign Default User: assign the chat to the default userShift Table- Download Template, update shift schedule to the template, then upload.
Next Assignment Order- The next assignment order may vary based on the shift table. If the next assignment user is not available in the shift table, system will assign the chat to the next available user in the sequence.
Deploy Roster in Chatbot : create or go to existing chatbot.
Drag and release Roster widget into the chatbot.

Update the following details and click Update:

Select Roster Group from the drop down list.
Enable/Disable Send Staff Contact
Enable/Disable Send Staff's Name Card
Enable/Disable Assign in System
Enable/Disable Notify Staff
Connect Roster widget to chatbot and Save chatbot.

The Shift Management is set!
Roster Unavailable
The Roster Unavailable function allows managers to record when a staff member is not available for work due to annual leave, emergency leave, or sick leave. This helps maintain accurate shift planning and prevents scheduling conflicts.
The system will automatically exclude the staff from any shift assignments during the unavailable period.
The record will be reflected in the Roster Groups.
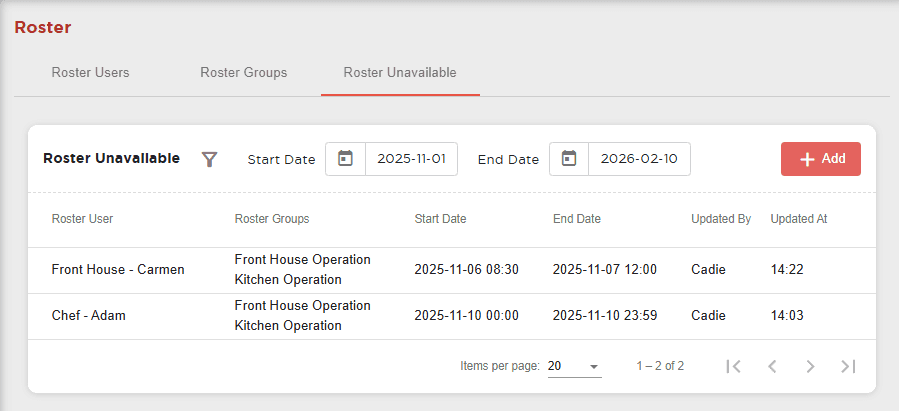
Go to the "Roster Unavailable" tab.
Click "+ Add" to start updating -
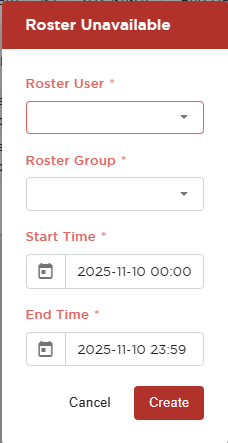
Roster User: Select affected user.
Roster Group: Select affected schedule/shift.
Start Time: Update the start of unavailable date and time.
End Time: Update the end of unavailable date and time.
When completed all fields, click "Create".